# Pyr0-piezo Beta Unit Firmware Update Procedure
## Utilizing the Pyr0-Piezo AVR Programming Jig
### Physical Construction of the Jig
The AVR Programming jig consists of several components:
- A PCB with USB-UART bridge (or a TTL header)
- A second PCB with ICSP header and Diag Headers installed
- 5MM 3D Printed Standoffs between the two boards
- 0.65mm Diameter Pogo Pins that span the two PCB's
- The three main body components of the jig
- The hinge joints, and clamp
- Hardware:
- 4x M3 16mm Bolts
- 5x M3 22mm Bolts
Assembly animation:
---
## Uploading Firmware Without a Jig
Uploading firmware without a Pyr0-Piezo AVR Programming Jig requires soldering to the test pads on the bottom of the Sensor's PCB:
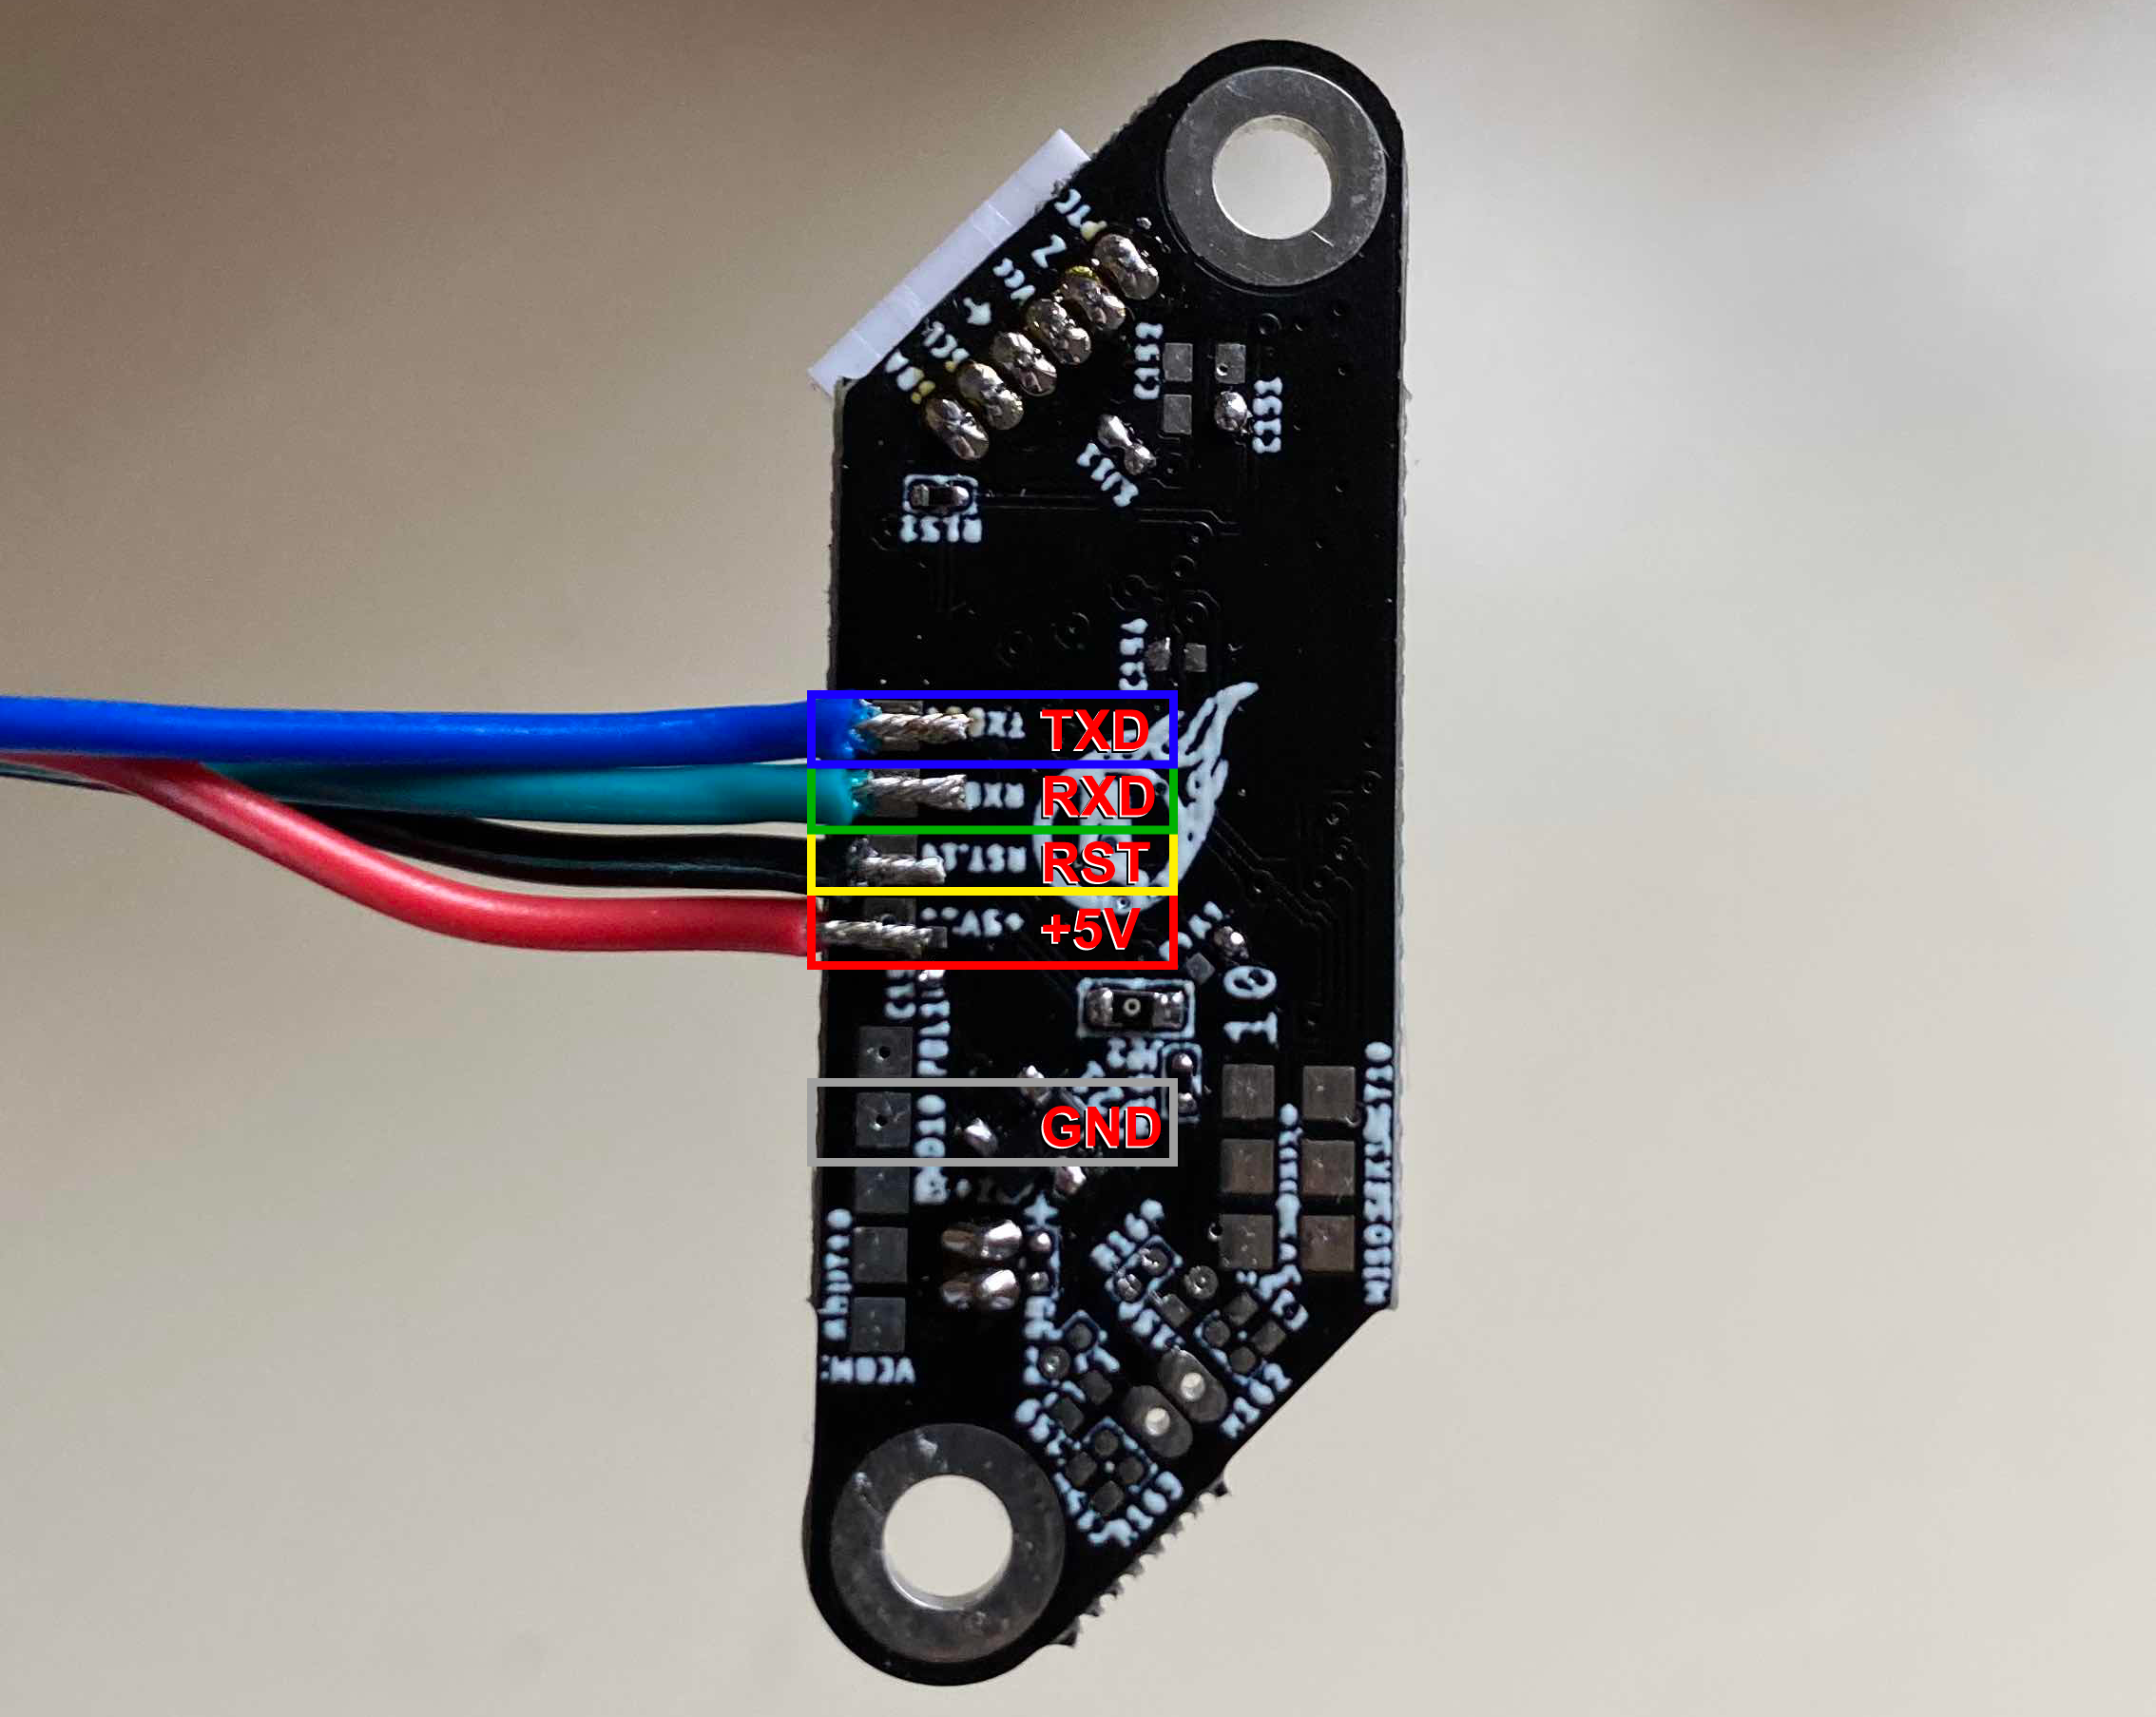
To utilize the UART's in-built auto-reset function, a 10k resistor and a small capacitor must be added to the reset wire in the configuration below:
---
## Obtaining the Latest Firmware
You can obtain the latest firmware release for this project [HERE](https://github.com/pyr0ball/pyr0piezo/releases/latest) as a zip file with the source, as well as a pre-compiled hex file for use with certain programmers.
---
## Firmware Upload Procedure
The firmware for this project can be updated using one of three methods: VS Code, Arduino IDE, or avrdude.
Please be sure you've already [wired up your sensor's UART port](../../schematics/other/uart-programmer-wiring.md) or used the programmig jig described earlier in this page.
If you built your own board and are starting out with a completely factory-fresh MCU, you'll need to install a bootloader. Have a look at [Uploading over ICSP] for instructions on how to do that.
---
### VS Code (Preferred Application)
#### Installing dependencies
1. Install [VS Code from Micosoft's official page](https://code.visualstudio.com/download)
2. Use the "Extensions" menu to install PlatformIO.
3. (Optional) Install extra plugins to assist in development:
- GitLens
- markdownlint
- Markdown Preview Enhanced
- C/C++
- C++ Intellisense
- Python
#### Configuration
1. In PIO Home, open the firmware folder:
- `~/pyr0piezo/firmware/AVR-Source/Pyr0_Piezo_sensor_v2.x.x`
#### Upload
1. Make any desired adjustments to default values in `src/pP_config.h`
2. Click the "PlatformIO: Upload" button found in the bottom bar of the VS Code window
3. Verify Serial connection by opening the Serial Monitor and typing `CONFIG` or `STATE`. You should get a response.
#### Uploading over ICSP
Using this method will install the bootloader required to upload firmware over UART
1. Open the `platformio.ini` file found in the Pyr0_Piezo_sensor_v2.x.x folder
2. Change the `defailt_envs` parameter to `ICSP_Bootloader`
```ini
[platformio]
default_envs = ICSP_Bootloader```
---
### Arduino IDE
1. Install [Arduino IDE from Arduino's official page](https://www.arduino.cc/en/main/software)
2. Under File > Preferences > Additional Board Manager URL's, Add:
- `https://mcudude.github.io/MiniCore/package_MCUdude_MiniCore_index.json`
---
### AVRDUDESS
#### Windows (Only)
AVRDUDESS is a GUI version of the avrdude application used for flashing firmware to AVR based MCU's, [and can be found here](https://blog.zakkemble.net/avrdudess-a-gui-for-avrdude/)
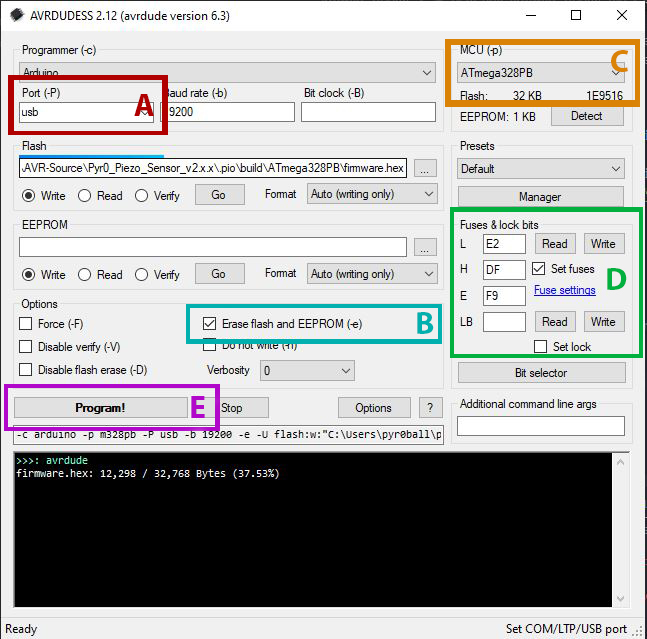
After installing AVRDUDESS, and opening it, follow the image below with the settings here:
- **A.** Choose the COM port of your UART programmer from the pulldown menu
- **B.** Ensure "Erase Flash and EEPROM" is checked
- **C.** From the MCU Pulldown, select "Atmega328PB"
- **D.** Set the Fuse Bits to `E2`, `DF`, `F9` respectively. Leave LB *blank*
- **E.** Click the Flash button to begin the upload process
---
### avrdude
#### Windows
1. Install a bash-like terminal. Choose from a number of options:
- [Windows Subsystem for Linux]
- [CygWin]
- [Mingw64]
- [Git Bash (Comes bundled with Git for Windows)]
2. Download the [avrdude binaries]
3. Extract the binaries somewhere your terminal can find them
#### Linux
##### Ubuntu/Debian Distro's
```bash
sudo apt update && sudo apt install -y avrdude
```
##### Fedora/RHEL/CentOS Distros
```bash
sudo yum install -y avrdude
```