4.4 KiB
Pyr0-piezo Beta Unit Firmware Update Procedure
Utilizing the Pyr0-Piezo AVR Programming Jig
Physical Construction of the Jig
The AVR Programming jig consists of several components:
- A PCB with USB-UART bridge (or a TTL header)
- A second PCB with ICSP header and Diag Headers installed
- 5MM 3D Printed Standoffs between the two boards
- 0.65mm Diameter Pogo Pins that span the two PCB's
- The three main body components of the jig
- The hinge joints, and clamp
- Hardware:
- 4x M3 16mm Bolts
- 5x M3 22mm Bolts
Assembly animation:
Uploading Firmware Without a Jig
Uploading firmware without a Pyr0-Piezo AVR Programming Jig requires soldering to the test pads on the bottom of the Sensor's PCB:
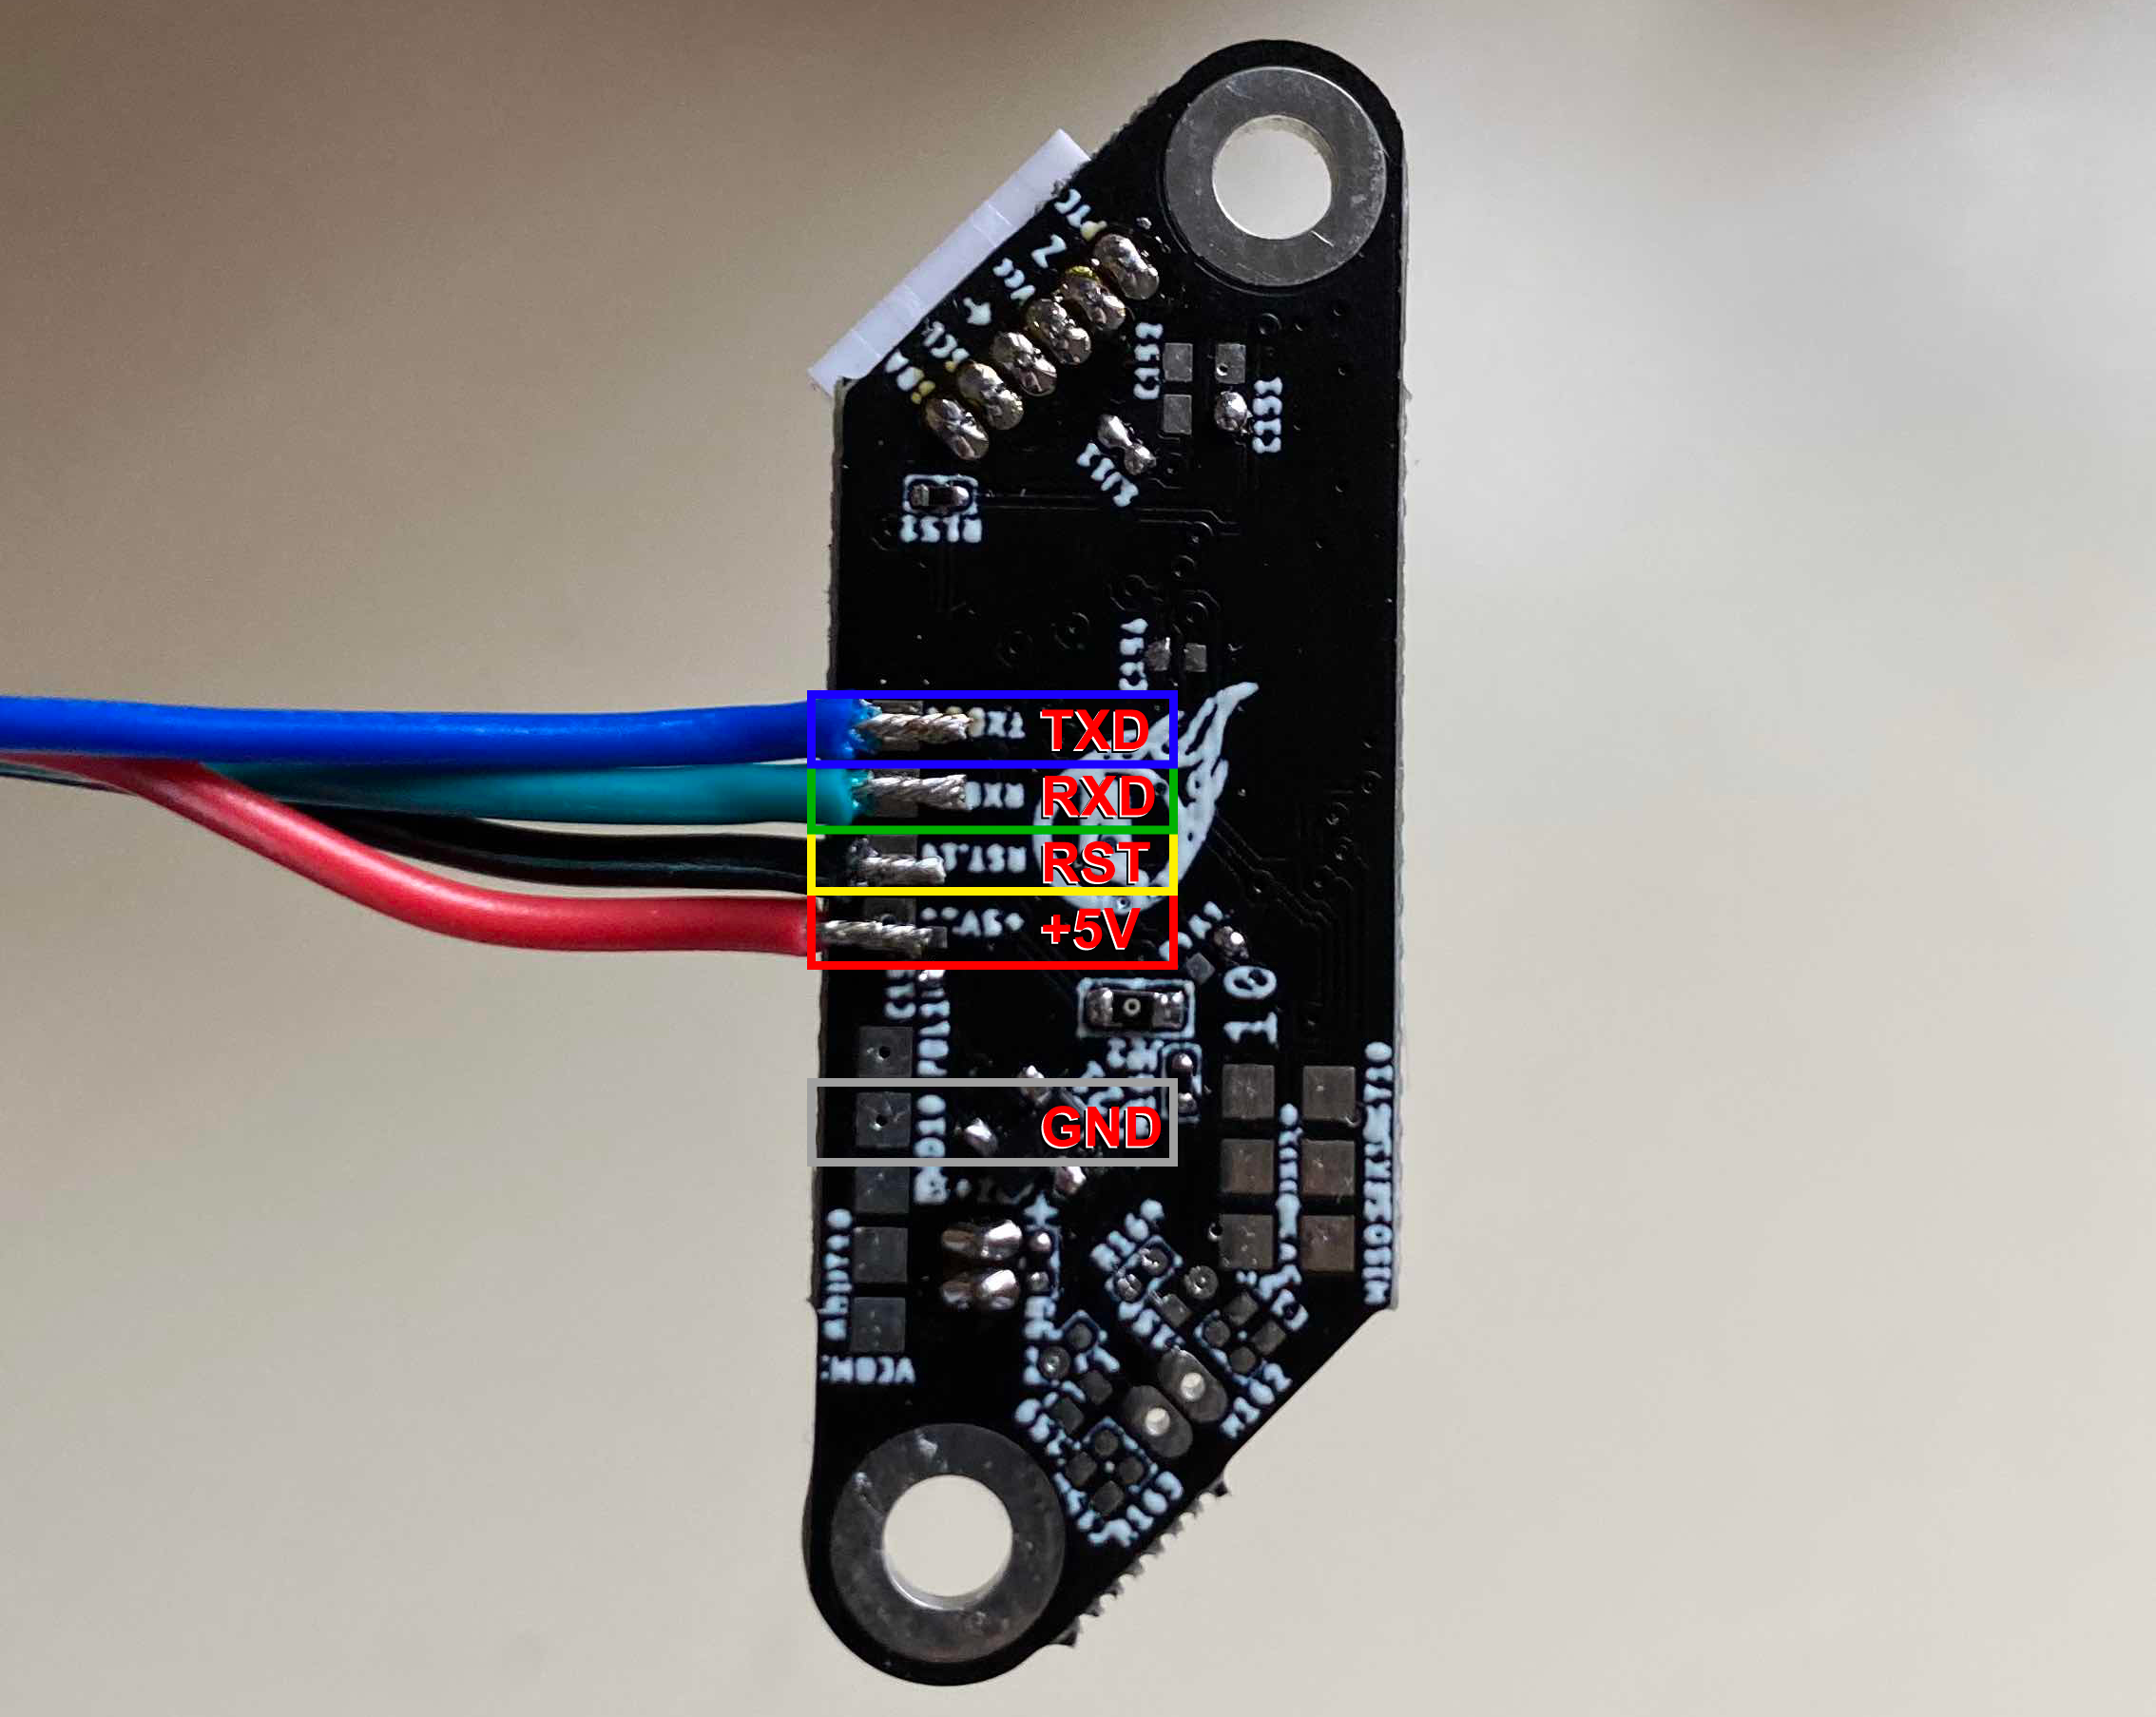
To utilize the UART's in-built auto-reset function, a 10k resistor and a small capacitor must be added to the reset wire in the configuration below:
Firmware Upload Procedure
The firmware for this project can be updated using one of three methods: VS Code, Arduino IDE, or avrdude.
Please be sure you've already wired up your sensor's UART port or used the programmig jig described earlier in this page.
VS Code (Preferred Application)
Installing dependencies
- Install VS Code from Micosoft's official page
- Use the "Extensions" menu to install PlatformIO.
- (Optional) Install extra plugins to assist in development:
- GitLens
- markdownlint
- Markdown Preview Enhanced
- C/C++
- C++ Intellisense
- Python
Configuration
- In PIO Home, open the firmware folder:
~/pyr0piezo/firmware/AVR-Source/Pyr0_Piezo_sensor_v2.x.x
- Make certain you're on the latest
developbranch- In GitLense, under the "Repositories" menu, expand the "Branches" menu
- Right click on
developand select "Switch to Branch" - Back at the top of the "Repositories" menu, hover the mouse over
Pyr0_Piezo_Sensor_v2.x.xand click first onfetch, then onpull
Upload
- Make any desired adjustments to default values in
src/pP_config.h - Click the "PlatformIO: Upload" button found in the bottom bar of the VS Code window
- Verify Serial connection by opening the Serial Monitor and typing
CONFIGorSTATE. You should get a response.
Arduino IDE
- Install Arduino IDE from Arduino's official page
- Under File > Preferences > Additional Board Manager URL's, Add:
https://mcudude.github.io/MiniCore/package_MCUdude_MiniCore_index.json
AVRDUDESS
Windows (Only)
AVRDUDESS is a GUI version of the avrdude application used for flashing firmware to AVR based MCU's, and can be found here
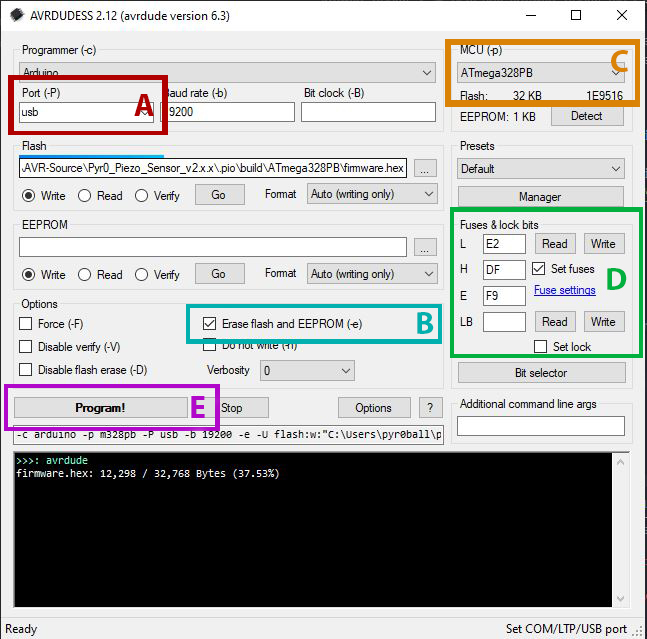
After installing AVRDUDESS, and opening it, follow the image below with the settings here:
- A. Choose the COM port of your UART programmer from the pulldown menu
- B. Ensure "Erase Flash and EEPROM" is checked
- C. From the MCU Pulldown, select "Atmega328PB"
- D. Set the Fuse Bits to
E2,DF,F9respectively. Leave LB blank - E. Click the Flash button to begin the upload process
avrdude
Windows
- Install a bash-like terminal. Choose from a number of options:
- [Windows Subsystem for Linux]
- [CygWin]
- [Mingw64]
- [Git Bash (Comes bundled with Git for Windows)]
- Download the [avrdude binaries]
- Extract the binaries somewhere your terminal can find them
Linux
Ubuntu/Debian Distro's
sudo apt update && sudo apt install -y avrdude
Fedora/RHEL/CentOS Distros
sudo yum install -y avrdude